圖解如何在Spring Boot中使用JSP頁面
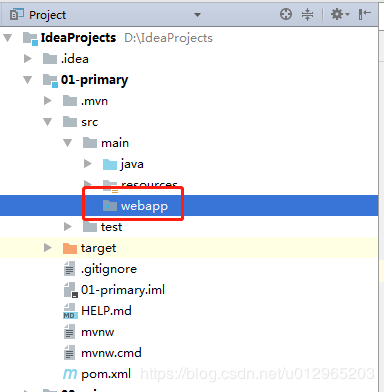
一、創建webapp目錄
在src/main下創建webapp目錄,用于存放jsp文件。這就是一個普通的目錄,無需執行Mark Directory As
二、創建jsp
1、指定web資源目錄
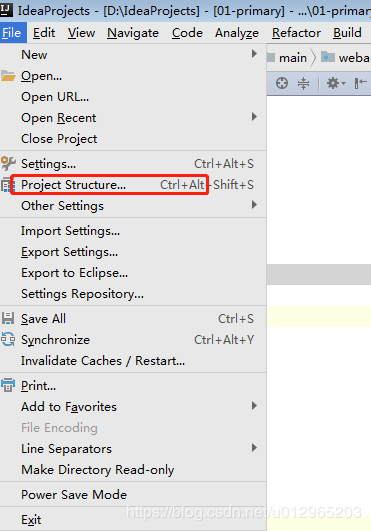
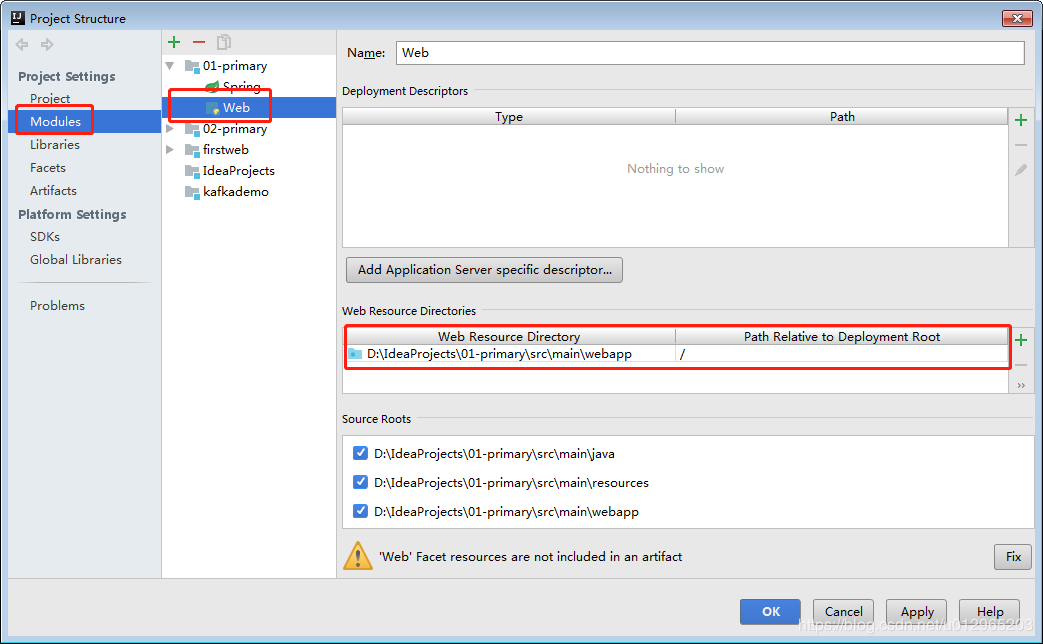
在spring boot工程中若要創建jsp文件,一般是需要在src/main下創建webapp目錄,然后在該目錄下創建jsp文件。但通過Alt + Insert發現沒有創建jsp文件的選項。此時,需要打開Project Structrue窗口,將webapp目錄指定為web資源目錄,然后才可以創建jsp文件。
指定后便可看到下面的窗口情況。
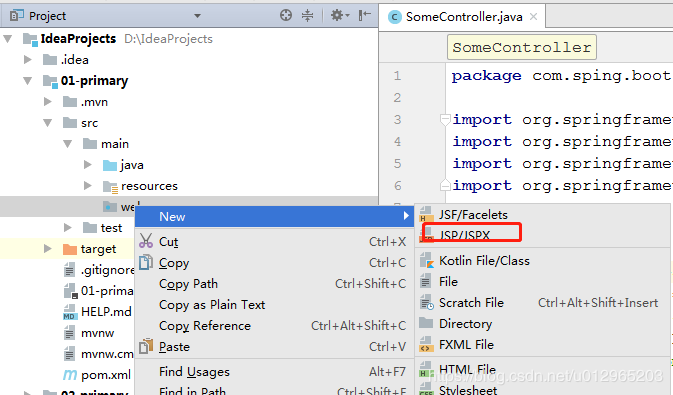
此時,便可在webapp中找到jsp的創建選項了。
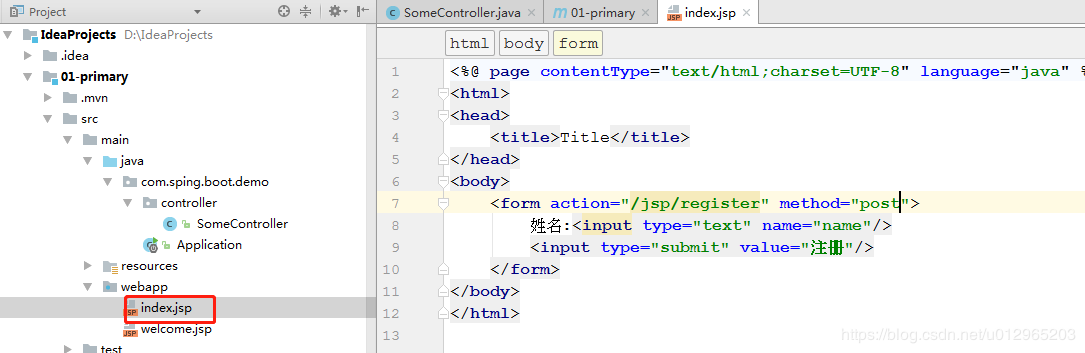
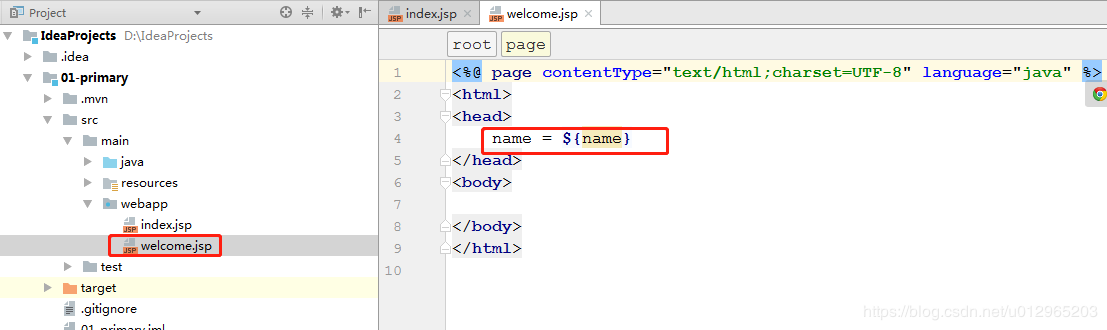
2、創建index.jsp頁面與welcome.jsp頁面
三、添加jasper依賴
在pom中添加一個Tomcat內嵌的jsp引擎jasper依賴。
<dependency><groupId>org.apache.tomcat.embed</groupId><artifactId>tomcat-embed-jasper</artifactId></dependency>
四、注冊資源目錄
在pom文件中將webapp目錄注冊為資源目錄
<build><resources><!--注冊webapp目錄為資源目錄--><resource><directory>src/main/webapp</directory><targetPath>META-INF/resources</targetPath><includes><include>**/*.*</include></includes></resource></resources> <plugins><plugin><groupId>org.springframework.boot</groupId><artifactId>spring-boot-maven-plugin</artifactId></plugin></plugins></build>
不過,我們一般會添加兩個資源目錄:
<resources><!--注冊Dao包目錄下Mybatis映射文件資源目錄--><resource><directory>src/main/java</directory><includes><include>**/*.xml</include></includes></resource> <!--注冊webapp目錄為資源目錄--><resource><directory>src/main/webapp</directory><targetPath>META-INF/resources</targetPath><includes><include>**/*.*</include></includes></resource></resources>
四、創建Controller

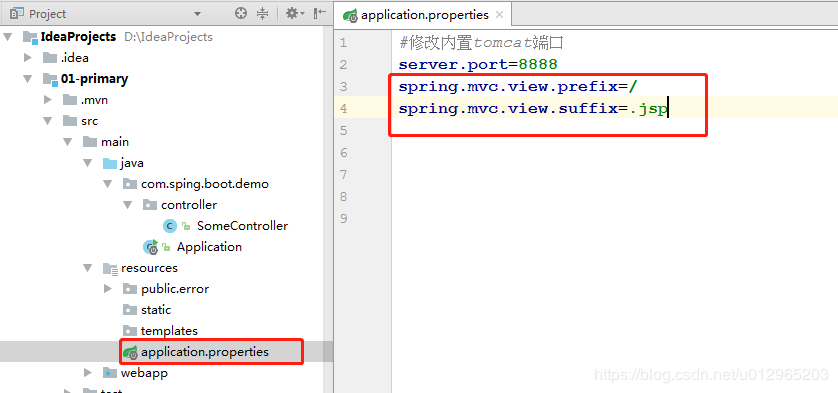
五、邏輯視圖配置
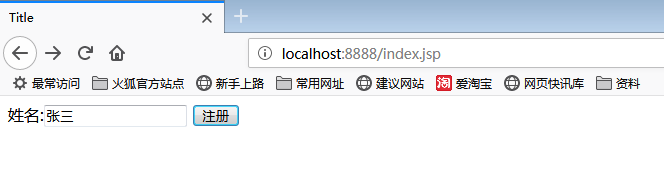
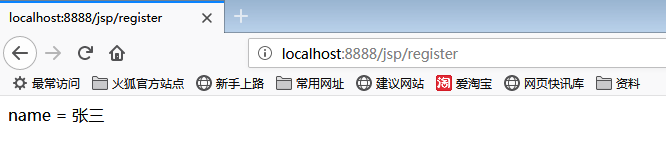
六、訪問
以上就是本文的全部內容,希望對大家的學習有所幫助,也希望大家多多支持好吧啦網。
相關文章:

 網公網安備
網公網安備