python 識(shí)別登錄驗(yàn)證碼圖片功能的實(shí)現(xiàn)代碼(完整代碼)
在編寫自動(dòng)化測(cè)試用例的時(shí)候,每次登錄都需要輸入驗(yàn)證碼,后來想把讓python自己識(shí)別圖片里的驗(yàn)證碼,不需要自己手動(dòng)登陸,所以查了一下識(shí)別功能怎么實(shí)現(xiàn),做一下筆記。
首選導(dǎo)入一些用到的庫,re、Image、pytesseract、selenium、time
import re # 用于正則from PIL import Image # 用于打開圖片和對(duì)圖片處理import pytesseract # 用于圖片轉(zhuǎn)文字from selenium import webdriver # 用于打開網(wǎng)站import time # 代碼運(yùn)行停頓
首先需要獲取驗(yàn)證碼圖片,才能進(jìn)一步識(shí)別。
創(chuàng)建類,定義webdriver和find_element_by_selector方法,用來打開網(wǎng)頁和定位驗(yàn)證碼圖片的元素
class VerificationCode: def __init__(self): self.driver = webdriver.Firefox() self.find_element = self.driver.find_element_by_css_selector
然后打開瀏覽器截取驗(yàn)證碼圖片
def get_pictures(self): self.driver.get(’http://123.255.123.3’) # 打開登陸頁面 self.driver.save_screenshot(’pictures.png’) # 全屏截圖 page_snap_obj = Image.open(’pictures.png’) img = self.find_element(’#pic’) # 驗(yàn)證碼元素位置 time.sleep(1) location = img.location size = img.size # 獲取驗(yàn)證碼的大小參數(shù) left = location[’x’] top = location[’y’] right = left + size[’width’] bottom = top + size[’height’] image_obj = page_snap_obj.crop((left, top, right, bottom)) # 按照驗(yàn)證碼的長(zhǎng)寬,切割驗(yàn)證碼 image_obj.show() # 打開切割后的完整驗(yàn)證碼 self.driver.close() # 處理完驗(yàn)證碼后關(guān)閉瀏覽器 return image_obj
未處理前的驗(yàn)證碼圖片如下:

未處理的驗(yàn)證碼圖片,對(duì)于python來說識(shí)別率較低,仔細(xì)看可以發(fā)現(xiàn)圖片里有很對(duì)五顏六色擾亂識(shí)別的點(diǎn),非常影響識(shí)別率。
下面對(duì)獲取的驗(yàn)證碼進(jìn)行處理。
首先用convert把圖片轉(zhuǎn)成黑白色。設(shè)置threshold閾值,超過閾值的為黑色
def processing_image(self): image_obj = self.get_pictures() # 獲取驗(yàn)證碼 img = image_obj.convert('L') # 轉(zhuǎn)灰度 pixdata = img.load() w, h = img.size threshold = 160 # 該閾值不適合所有驗(yàn)證碼,具體閾值請(qǐng)根據(jù)驗(yàn)證碼情況設(shè)置 # 遍歷所有像素,大于閾值的為黑色 for y in range(h): for x in range(w):if pixdata[x, y] < threshold: pixdata[x, y] = 0else: pixdata[x, y] = 255 return img
經(jīng)過灰度處理后的圖片

然后刪除一些擾亂識(shí)別的像素點(diǎn)。
def delete_spot(self): images = self.processing_image() data = images.getdata() w, h = images.size black_point = 0 for x in range(1, w - 1): for y in range(1, h - 1):mid_pixel = data[w * y + x] # 中央像素點(diǎn)像素值if mid_pixel < 50: # 找出上下左右四個(gè)方向像素點(diǎn)像素值 top_pixel = data[w * (y - 1) + x] left_pixel = data[w * y + (x - 1)] down_pixel = data[w * (y + 1) + x] right_pixel = data[w * y + (x + 1)] # 判斷上下左右的黑色像素點(diǎn)總個(gè)數(shù) if top_pixel < 10: black_point += 1 if left_pixel < 10: black_point += 1 if down_pixel < 10: black_point += 1 if right_pixel < 10: black_point += 1 if black_point < 1: images.putpixel((x, y), 255) black_point = 0 # images.show() return images
經(jīng)過去除噪點(diǎn)處理后的圖片
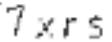
最后把處理后的圖片轉(zhuǎn)成文字。
先設(shè)置pytesseract的路徑,因?yàn)槟J(rèn)路徑是錯(cuò)的,然后轉(zhuǎn)換圖片為文字,由于個(gè)別圖片中識(shí)別會(huì)出現(xiàn)處理遺漏,會(huì)被識(shí)別成空格或則點(diǎn)或則分號(hào)什么的,所以增加了一個(gè)去除驗(yàn)證碼中特殊字符的處理。
PS:tesseract文件下載鏈接
def image_str(self): image = self.delete_spot() pytesseract.pytesseract.tesseract_cmd = r'C:Program FilesTesseract-OCRtesseract.exe' # 設(shè)置pyteseract路徑 result = pytesseract.image_to_string(image) # 圖片轉(zhuǎn)文字 resultj = re.sub(u'([^u4e00-u9fa5u0030-u0039u0041-u005au0061-u007a])', '', result) # 去除識(shí)別出來的特殊字符 result_four = resultj[0:4] # 只獲取前4個(gè)字符 # print(resultj) # 打印識(shí)別的驗(yàn)證碼 return result_four
完整代碼如下:
import re # 用于正則from PIL import Image # 用于打開圖片和對(duì)圖片處理import pytesseract # 用于圖片轉(zhuǎn)文字from selenium import webdriver # 用于打開網(wǎng)站import time # 代碼運(yùn)行停頓 class VerificationCode: def __init__(self): self.driver = webdriver.Firefox() self.find_element = self.driver.find_element_by_css_selector def get_pictures(self): self.driver.get(’http://123.255.123.3’) # 打開登陸頁面 self.driver.save_screenshot(’pictures.png’) # 全屏截圖 page_snap_obj = Image.open(’pictures.png’) img = self.find_element(’#pic’) # 驗(yàn)證碼元素位置 time.sleep(1) location = img.location size = img.size # 獲取驗(yàn)證碼的大小參數(shù) left = location[’x’] top = location[’y’] right = left + size[’width’] bottom = top + size[’height’] image_obj = page_snap_obj.crop((left, top, right, bottom)) # 按照驗(yàn)證碼的長(zhǎng)寬,切割驗(yàn)證碼 image_obj.show() # 打開切割后的完整驗(yàn)證碼 self.driver.close() # 處理完驗(yàn)證碼后關(guān)閉瀏覽器 return image_obj def processing_image(self): image_obj = self.get_pictures() # 獲取驗(yàn)證碼 img = image_obj.convert('L') # 轉(zhuǎn)灰度 pixdata = img.load() w, h = img.size threshold = 160 # 遍歷所有像素,大于閾值的為黑色 for y in range(h): for x in range(w):if pixdata[x, y] < threshold: pixdata[x, y] = 0else: pixdata[x, y] = 255 return img def delete_spot(self): images = self.processing_image() data = images.getdata() w, h = images.size black_point = 0 for x in range(1, w - 1): for y in range(1, h - 1):mid_pixel = data[w * y + x] # 中央像素點(diǎn)像素值if mid_pixel < 50: # 找出上下左右四個(gè)方向像素點(diǎn)像素值 top_pixel = data[w * (y - 1) + x] left_pixel = data[w * y + (x - 1)] down_pixel = data[w * (y + 1) + x] right_pixel = data[w * y + (x + 1)] # 判斷上下左右的黑色像素點(diǎn)總個(gè)數(shù) if top_pixel < 10: black_point += 1 if left_pixel < 10: black_point += 1 if down_pixel < 10: black_point += 1 if right_pixel < 10: black_point += 1 if black_point < 1: images.putpixel((x, y), 255) black_point = 0 # images.show() return images def image_str(self): image = self.delete_spot() pytesseract.pytesseract.tesseract_cmd = r'C:Program FilesTesseract-OCRtesseract.exe' # 設(shè)置pyteseract路徑 result = pytesseract.image_to_string(image) # 圖片轉(zhuǎn)文字 resultj = re.sub(u'([^u4e00-u9fa5u0030-u0039u0041-u005au0061-u007a])', '', result) # 去除識(shí)別出來的特殊字符 result_four = resultj[0:4] # 只獲取前4個(gè)字符 # print(resultj) # 打印識(shí)別的驗(yàn)證碼 return result_four if __name__ == ’__main__’: a = VerificationCode() a.image_str()
看評(píng)論有很多人需要tesseract.exe文件,但是由于文件過大,發(fā)郵件會(huì)出現(xiàn)無法下載的情況,有需要的可以在一下連接里下載tesseract.exe文件
到此這篇關(guān)于python 識(shí)別登錄驗(yàn)證碼圖片(完整代碼)的文章就介紹到這了,更多相關(guān)python識(shí)別登錄驗(yàn)證碼圖片內(nèi)容請(qǐng)搜索好吧啦網(wǎng)以前的文章或繼續(xù)瀏覽下面的相關(guān)文章希望大家以后多多支持好吧啦網(wǎng)!
相關(guān)文章:
1. 在layer彈出層中通過ajax返回html拼接字符串填充數(shù)據(jù)的方法2. 存儲(chǔ)于xml中需要的HTML轉(zhuǎn)義代碼3. java volatile案例講解4. asp.net core 中的Jwt(Json Web Token)的使用詳解5. 解決Ajax方式上傳文件報(bào)錯(cuò)"Uncaught TypeError: Illegal invocation"6. jsp實(shí)現(xiàn)textarea中的文字保存換行空格存到數(shù)據(jù)庫的方法7. 編寫xml沒有代碼提示的解決方法8. 用xslt將xml解析成xhtml的代碼9. JSP的Cookie在登錄中的使用10. ztree+ajax實(shí)現(xiàn)文件樹下載功能

 網(wǎng)公網(wǎng)安備